

 Anatomy. It appears thus easy, nevertheless it is so advanced. it's the curse of each artist—you simply cannot re-evaluate a particular level of expertness while not having a minimum of some notion of anatomy. the general public ne'er completely study it, which ends up in shaky art foundations that leave them for good unsure of their own creative strength.
That is why it's wiser to dedicate a touch little bit of your daily creative time to learning anatomy. it would appear overwhelming initially, however if you break it down into items it becomes truly fun and straightforward to do!
1. The Basics: Functions and Anatomy
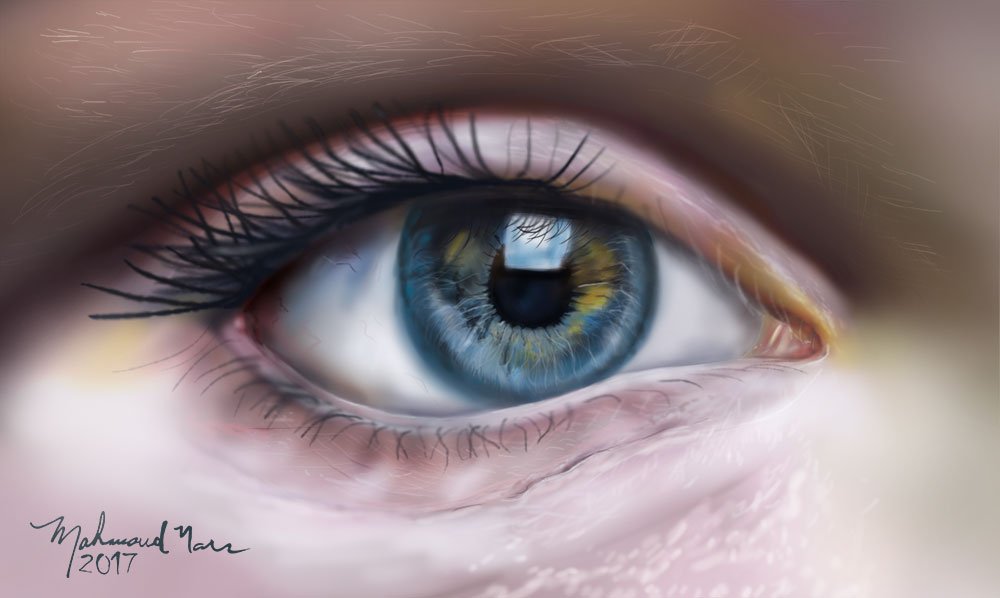
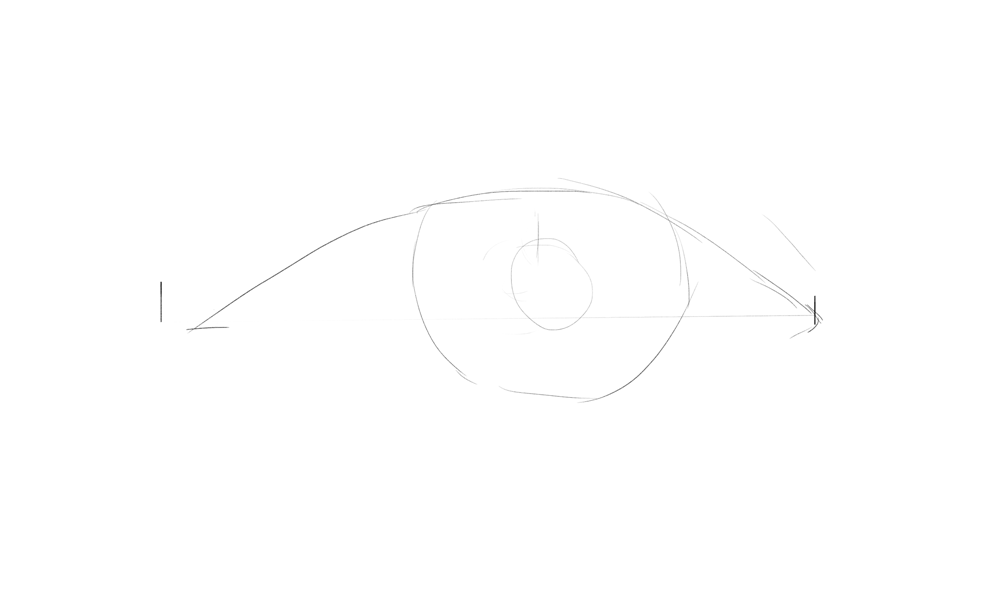
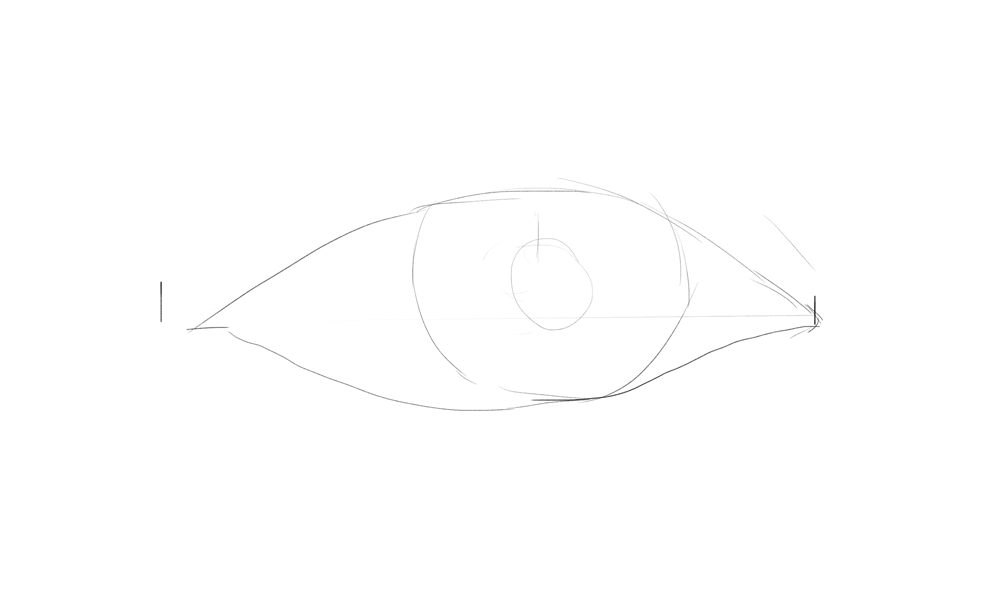
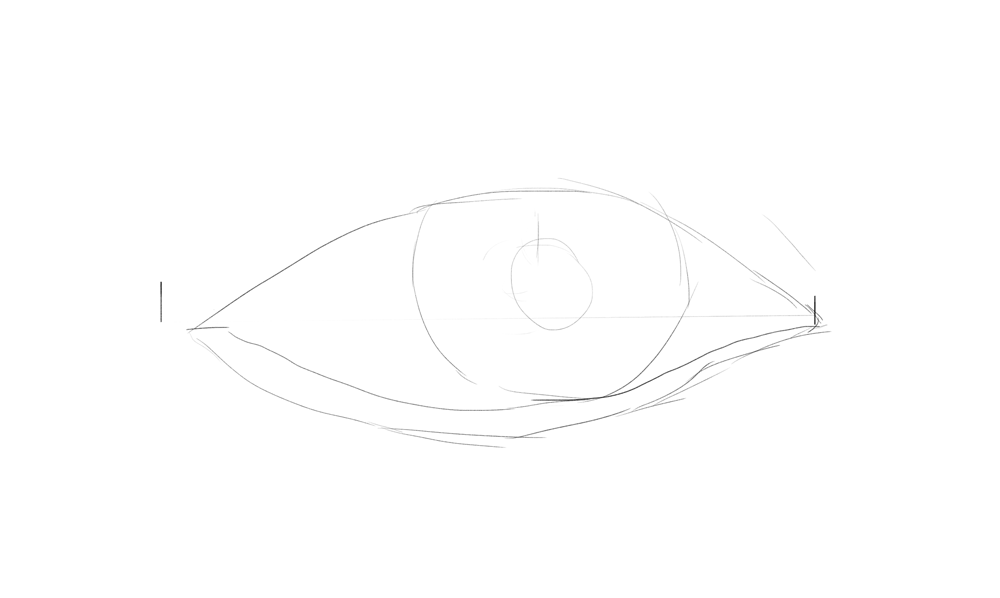
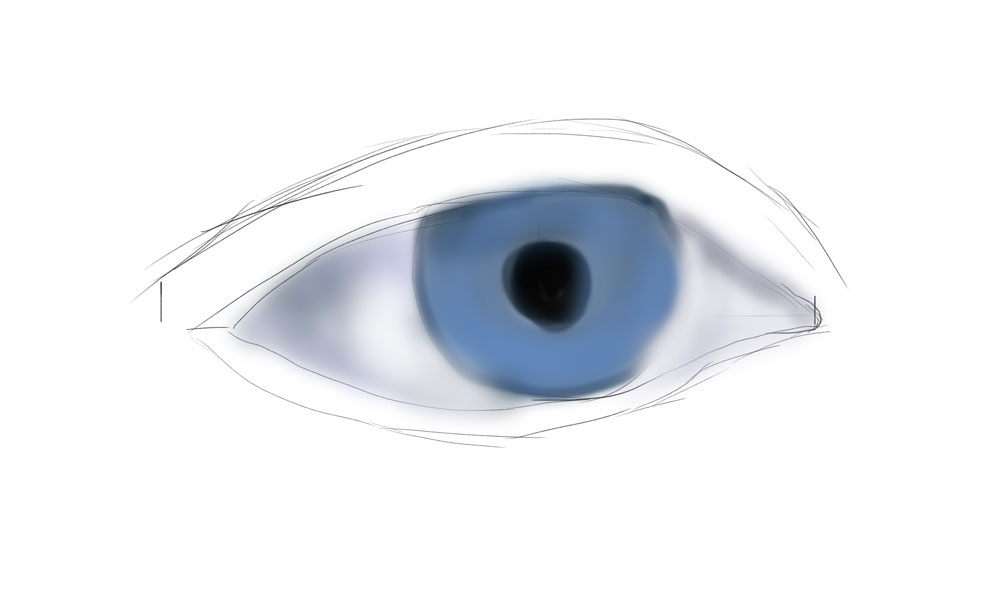
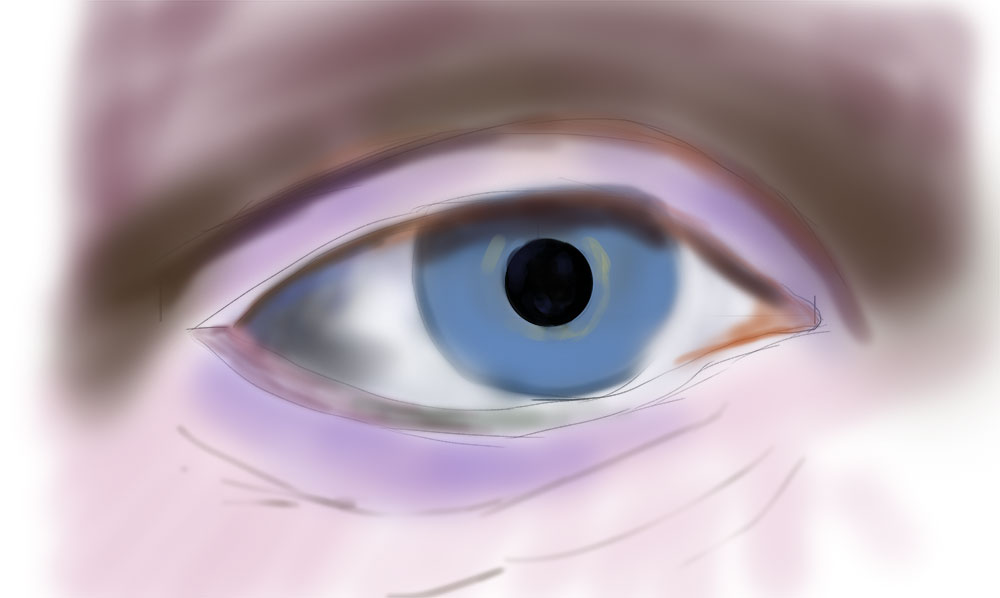
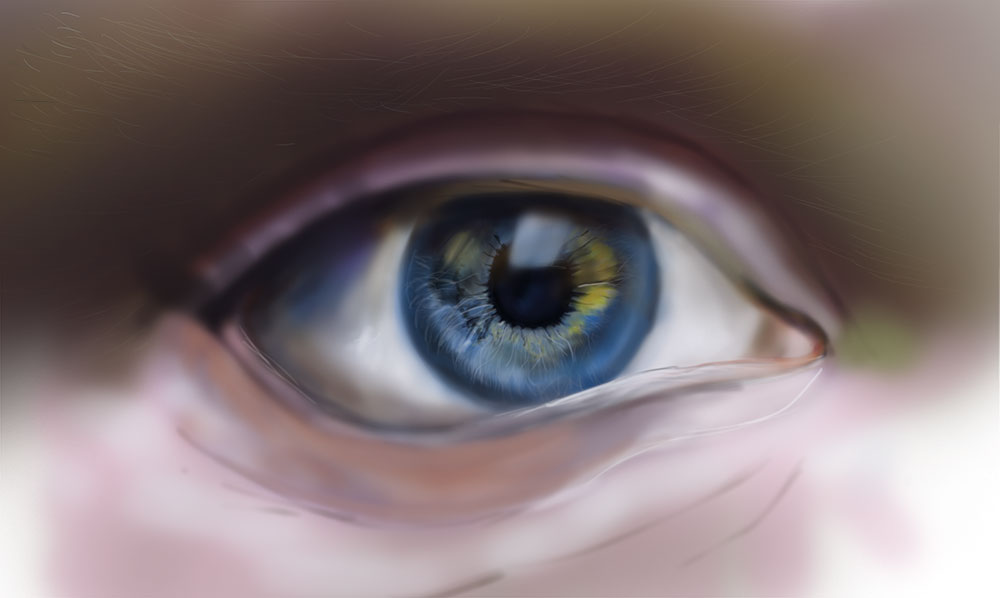
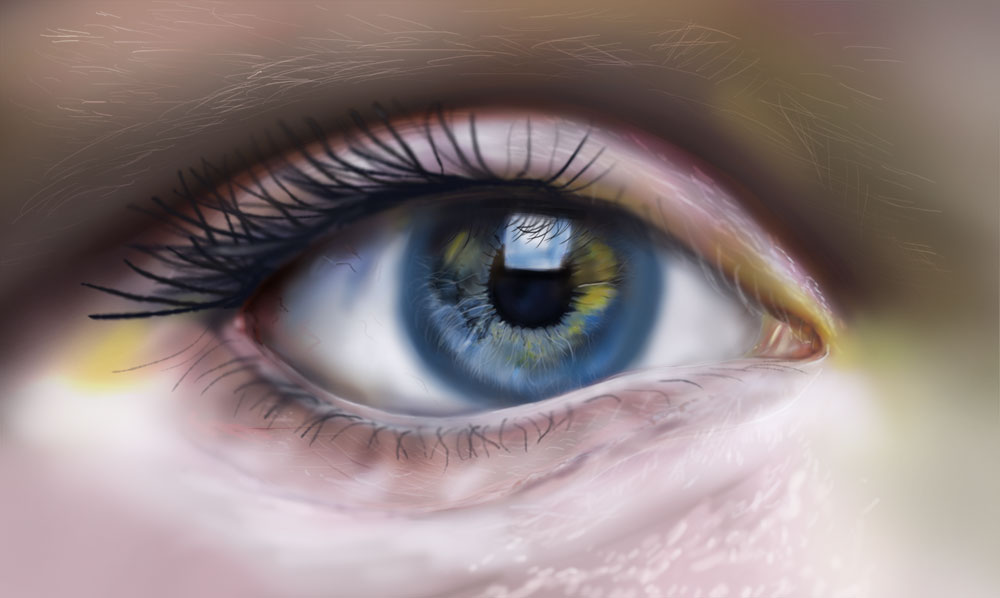
All eyes, in humans, have similar shapes associated setups: an oval with pointed edges, eyelids, eyelashes, eyebrows. you'll do a fast sketch of a watch and any person can acknowledge it as such:
Eye shape
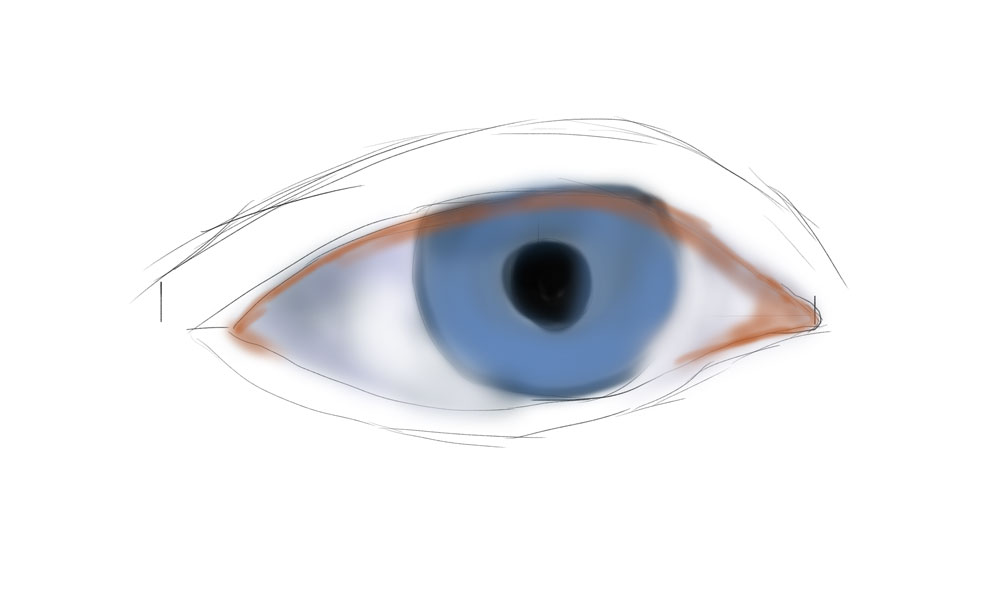
Eyebrow: they shield your eyes from dirt and drops of sweat running down your forehead.Eyelid crease: created by the protective fold once it folds over the eyeball. It forms each higher than and beneath the attention.
The actual eye gap: the skin is compound to form associate oval-shaped opening for the eyeball.
The eyelashes: they shield the attention from dirt, robust lightweight or sensory perception. In art, they emphasize trait.
The white of the attention: this is often the most ball of the eye.
The iris: truly muscles, go figure! They contract or expand to permit a lot of or less lightweight to travel within the eye through the....
Pupil: the black gap within the center. we have a tendency to truly see through this factor, since this is often wherever the sunshine enters to create a picture within our eyeball.
The lacrimal nodule: at the inner corner of every eye. we have a tendency to cry through this, and it's a chromatic color!
The lacrimal nodule's skin crease: on the surface of the inner corner of the attention, simply next to the nodule itself.
2. the various Eye Shapes
While the higher than may be a fast sketch which will be recognized as an individual's eye, eye shapes vary by race, geographical position and even age!
Let's cowl the foremost vital one: race. If you verify photos of assorted peoples you may positively notice variations. Let's re-evaluate some a lot of basic shapes, to ascertain the difference:
different eye shapes almond mongoloid hooded drooping
3. varied Angles and views
Here square measure some angles to indicate however the essential apparent form of the attention changes with the angle it's viewed from:
eye sketches at totally different angles
4. Eyes: The Mirror of the Soul
We categorical heaps of emotions with our eyes. in spite of our eye form or size, we have a tendency to as humans have spontaneous ways in which of reacting to stimuli, ways that} which involve modifications of our eyes.
We squint focussed, we have a tendency to stare in shocked awe, we have a tendency to widen our eyes in astonishment or fear—just to call some examples.
Below square measure many expressions which will be achieved by any human eye. act and take a look at quickly characteristic every feeling expressed and sketch them out. apply them so you'll later provide your characters a lot of emotion:
eye sketches showing totally different emotions
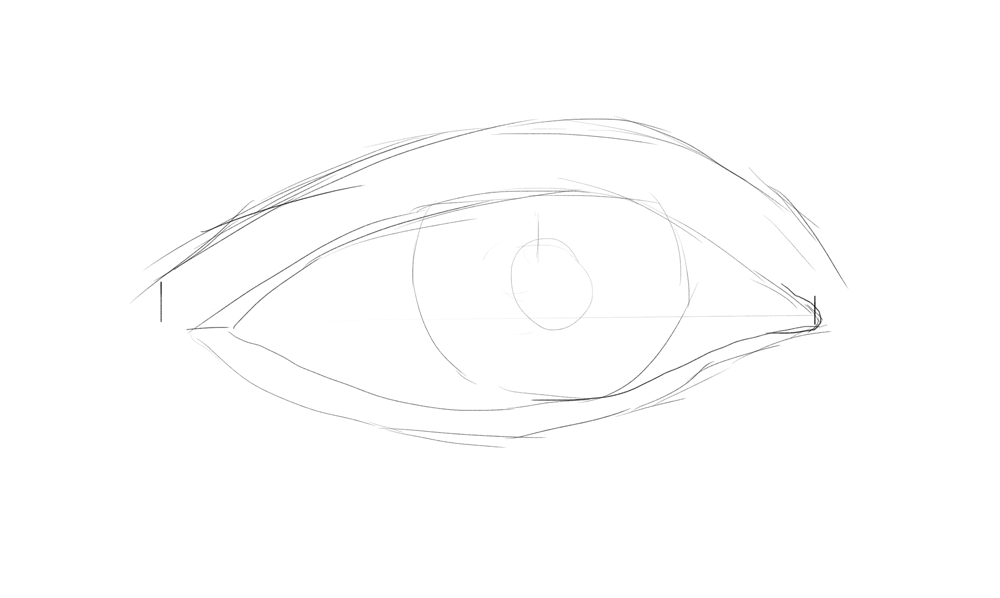
5. Sketch Out the attention
Now that we've got some notion of the sheer selection which will be obtained with one eye, let's act and begin golf stroke everything along.
Take the short sketch we have a tendency to created higher than to truly begin doing a little serious artsy stuff here and start our journey to being the new Michelangelos!
Create a replacement canvas, name the prevailing layer "Background", and set your foreground color to #dcb6a3 and your background one to #963931.
Using the Gradient Tool (G) set to Foreground to Background, drag from the left to the proper to form a skin-toned gradient. Then take a tough, spherical Brush (B), set its Size interference and Opacity interference to Pen Pressure, and set your foreground color to #000000.
Create a replacement layer, name it "Sketch", and sketch out a base form of your feeling. you'll use the initial one we have a tendency to did, otherwise you will choose any of those we've coated thus far!
Eye base
6. Fleshing It Out: The White of the attention
Step 1
Let's begin with the base—aka the white of the attention.
Despite its name of "white", the eyeball is something however pure white. It varies in reminder lightweight gray, beige and red, with varied blood vessels running through it.
To start on that, produce a replacement layer, move it between your "Background" and "Sketch" ones and name it "Eyewhite". Use a unclean white #ddc6bc and a tough, spherical brush to color the bottom color on that.
Step 2
Create a replacement layer higher than the "Eyewhite" one, and right-click on that and select produce Clipping Mask to the "Eyewhite" layer. we are going to use this layer to color the shading.
The eyeball may be a spherical structure, therefore the center can invariably receive the foremost lightweight since it's a broken-backed surface. On constant line of thought, the afar from the middle we have a tendency to get, the less lightweight can reach it because of eyelids/eyelashes shadowing it, thus you may need to use darker colours.
Thus, let's take the comb Tool (B) once more, set it to a tough, shape, and have its Opacity and Size interference turned on. change the dimensions pro re nata, then set your foreground color to #4f241e. Paint on the clipping mask layer, round the edges, to form the illusion of sunshine and shadow, and 3D.
Base shadows
Step 3
Take a darker tone, like #220b07, and paint round the high of the attention white, to form the extraordinary shadow the higher protective fold and therefore the eyelashes provide.
Detail shadows
7. Painting the Lacrimal Nodule
Step 1
Around this space, the skin does not cowl the flesh thus we'll have a way a lot of chromatic tone. Remember, there's no clear boundary line between the eyeball itself and therefore the flesh and muscles that keep it in place—they all react and fuse into each other. thus our pink can bleed into the white of the attention a touch, as you will see in an exceedingly moment.
Set your foreground color to #853c2e and your background one to #5e2218.
Using constant brush from before, paint round the inner fringe of the attention with the lighter color, then shade with the darker one round the edges. Add some touches of pink into the white space also. Below you'll see the results with and while not the sketch:
Lacrimal base
Step 2
Next set your foreground color to #d77661 and your background one to white #ffffff and lower the dimensions of your brush. centre and add elaborated highlights round the lighter areas —first exploitation the sunshine pink then adding a drop of white for a final bit. this can provide the looks of wet.
Lacrimal detail
8. The Iris and Pupil Bases
Step 1
Go ahead and build a replacement layer and move it between your "Eyewhite" and therefore the "Sketch" ones. Name it "Iris".
Set your foreground color to #6b3826 and brush a shape, following the sketch.
Iris base
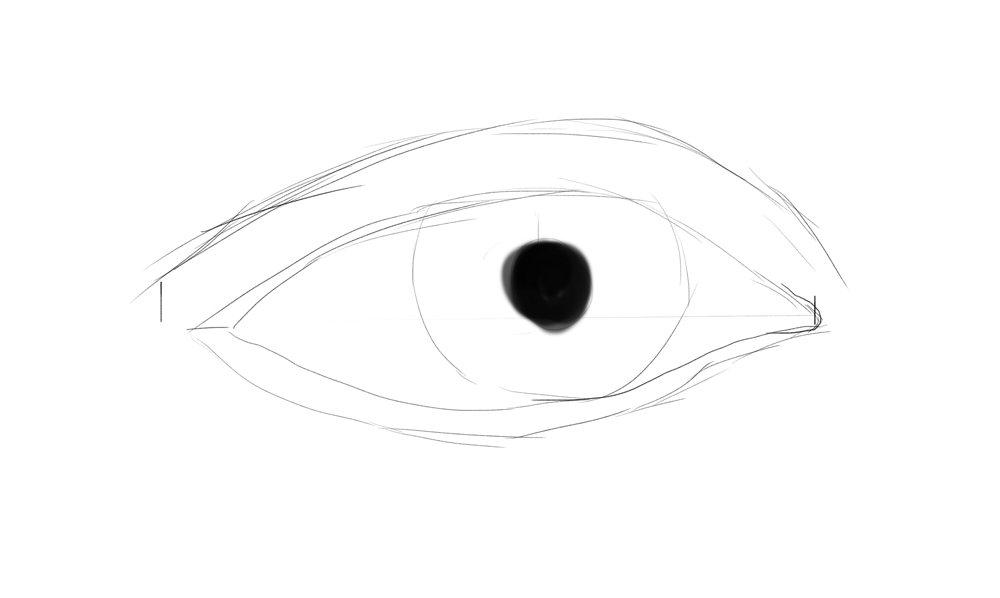
Step 2
An eye with a white pupil may be a bit creepy, thus let's take a black #000000 and paint a shape within the middle—again, following your sketch—to produce the pupil.
Pupil base
9. Adding in Iris Details

Step 1
It's time for a replacement layer! Place it simply higher than your "Iris" one, and name it "Iris Detail".
The iris and therefore the pupil mix into one another, and into the white of the attention. a lot of merely place... they simply like to mingle!
So set your foreground color to a pleasant #240b02 and, adjusting the dimensions of your brush, paint round the edges of the iris and therefore the pupil to mix them along nicely. whereas you're at it, conJoinly shade the upmost a part of the iris, to indicate the world wherever the higher protective fold and therefore the eyelashes solid a shadow. do not be afraid to travel over the sides a little bit.
Iris details - shadow
Step 2
Set your foreground color to #54382a and your background one to #3f2315 and, adjusting the dimensions of your brush to a fairly tiny one, centre and paint random strokes of lighter and darker color round the chromatic half. try and build all radiate from the middle.
Iris muscles base

Step 3
Next, we are going to add a lot of details to the iris. Set your foreground color to #9b643f and your background one to #511f05 and, lowering your brush size to solely some pixels, paint in small strands of muscle detail. Switch between your colours perpetually by pressing the X key. conJoinly be at liberty to feature in your own sampled colours, that you'll simply sample exploitation the Eyedropper Tool (I).
Iris muscles detail

10. Painting the attention Highlights
Since currently our eye may be a bit flat, let's provides it some highlights!
Create a replacement layer, place it higher than your "Iris Detail" one and name it "Highlights". Set your foreground color to white #ffffff and brush gently initially and tougher after, to form a fuzzy Pieris brassicae dot. Repeat the method to feature one or two of smaller ones:
Highlights
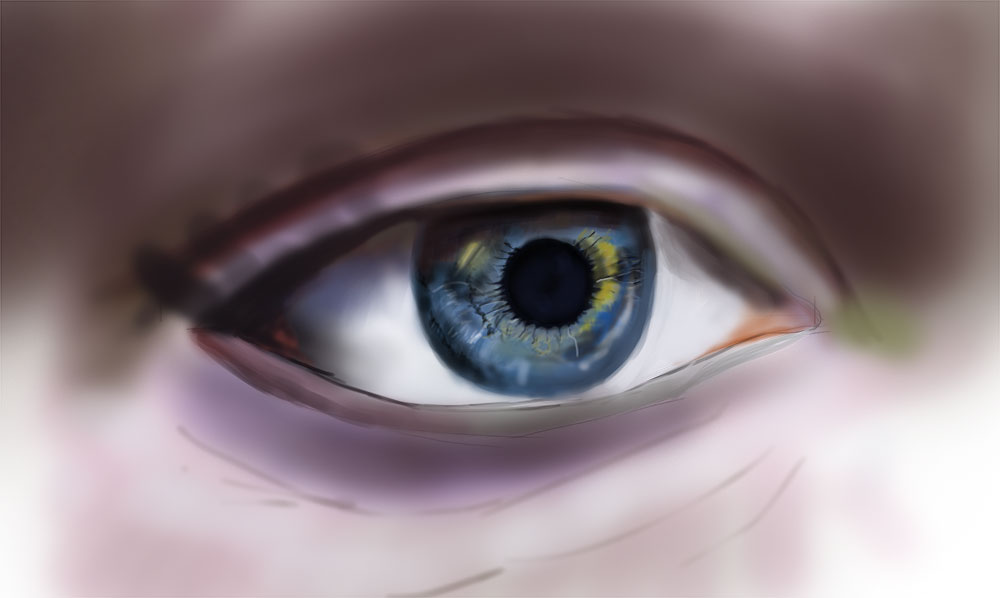
11. The higher Eyelid: Folds and Creases
Let us step away for a second from the eyeball itself, and build some progress with the attentionlids and skin encompassing the eye. From my expertise illustration invariably works best once you will see the larger picture—yes, pun intended—not once you work on separate small items.
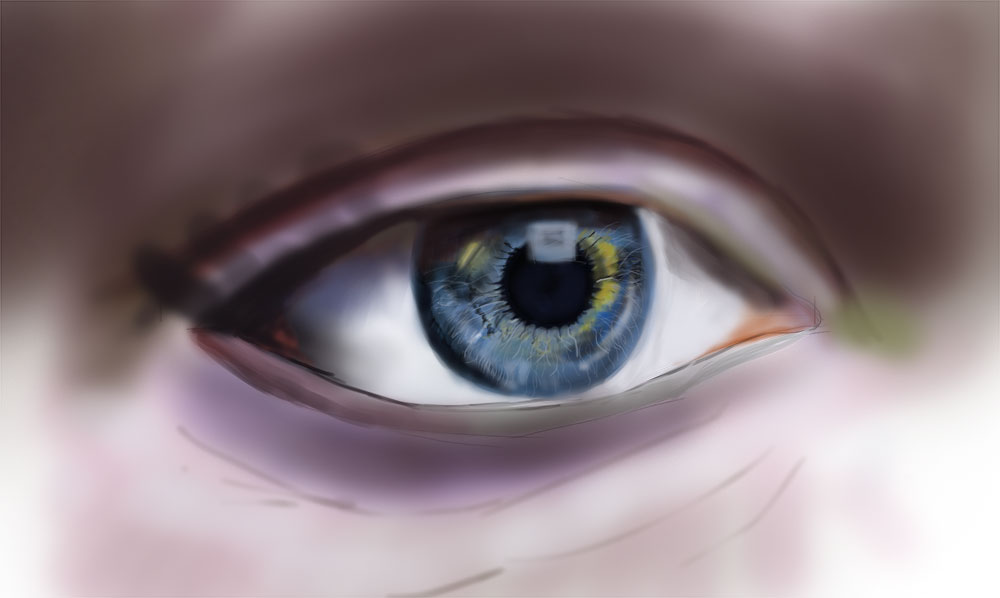
Step 1
So produce a replacement layer in particular your others, and name it "Skin". Take a dark brown #2c0b02 and set it as your foreground color, and a light-weight pink #d3a594 as your background one. change your brush size pro re nata and start to color round the define of the attention, invariably minding the first sketch.
Brush with the darker color 1st, then press X to change your swatches and paint gently with the lighter color round the inner areas of the attention, wherever the background skin gradient is lighter too.
Eye outlines
Step 2
Following your original sketch, use the darker brown to color the attention crease in.
Eye crease
Step 3
Next, set your foreground color to #2b130d and your background one to #bc8370. Brush 1st exploitation the darker color, round the outer ends of the attention and gently round the creases, to form your outlines look less sharp. Again, we have a tendency to aren't operating with precise and sharp lines and descriptions here, however with soft shapes.
Crease base shading
Step 4
Next, set your foreground color to #d5a197 and your background one to #fcead8 and turn the sharpness of the creases even a lot of, going from the darker pink to the lighter one and perpetually change colours in step with want by pressing X. If needed, you'll conJoinly use the Dodge Tool (O) set to a soft, spherical brush and Highlights mode with shield Tones unrestrained, to get shinier highlights. do not exaggerate the dodge tho'.
Crease elaborated shading
12. Adding the Lower Lid
Step 1
Time to change to the lower lid. we are going to paint it exploitation constant techniques as before.
If you discover it easier, you'll attend Image > Image Rotation and rotate your image ninety degrees, for a neater time drawing vertical lines. Or not—again, this is often up to you.
On to the coloring itself! Set your foreground color to #9e5b4a and your background one to #fecfbb. Brush gently round the bottom of the attention, to mix the dark define in, and on high of it brush with the lighter color to color the highlights.
Lower lid base
Step 2
We square measure attending to refine this rough lower lid.
We'll be operating with four main colors: #260f0b , #642e22 , #c88a7c and #eac0a9.
I recommend you paint four swatches on your canvas, so they're straightforward to sample with the Eyedropper Tool (I).
Let's begin by process the lower-right border of the attention with mild strokes of #260f0b, then travel to the minor crease to feature a #eac0a9 highlight.
Lower lid 1st details
Step 3
Take a pleasant #d18465 and brush below the attention, as if with a real-life concealer. you'll act and coat the face also, if you think that necessary.
Then exploitation the sunshine #eac0a9, paint round the outlines of the bottom-left eye and of the lacrimal corner, to feature a little little bit of highlight, a bit like below. Notice the second image—it is animated to indicate the distinction between the previous step and this one:
Lower lid finished
Lower lid animated
13. The Skin: Finishing Color Touches
The whole skin still appearance a touch plastic, does not it?
Time to vary that!
Pick up a pleasant brick color, like #c54432, and gently paint detail color spots round the eyelids, a lot of on the lowest lid round the inner 0.5. do not build them too visible—this isn't a zombie eye thus it is not unhealthy. simply one or two of mild brush strokes to relinquish it a lot of life.
Once you end doing that, switch your foreground color to a delicate violet like #937fa3 and your background to #b5544d.
Paint the attentionshadows on the brink of the lowest inner corner of the eye. this could facilitate build your eye look way more natural and alive!
At this stage you'll add alternative minor lighting details. Again, see below for the jpg result and therefore the animated comparison to the previous step.
Skin Details
Animated comparison:
Skin details animated
14. The Skin: Finishing Texture Touches
The skin remains too smooth—let's spice it up a bit!
Set your foreground color to #f2c8a0 and your background one to #b5544d. Use the "Skin Texture" brush provided within the .ZIP file to brush gently round the skin, perpetually pressing X to change your color swatches. you ought to get a soft texture like this:
Skin texture
15. Painting the Eyelashes
Step 1
Time to form a replacement layer and name it... "Eyelashes", of course!
Set your foreground color to #1a0906 and your Brush Tool (B) to a tough, shape with each Size interference and Opacity interference set to Pen Pressure mode.
On the Eyelashes layer begin drawing random lashes. Some points to recollect once drawing eyelashes:
They are ne'er straight. invariably draw them a touch arcuate.
They follow a chaotic order. strive trying up a reference image of a watch with makeup on: eyelashes tend to stay to 1 another, they have a tendency to bend, to curl.
They are invariably diluent at the tip than at the foundation.
Eyelashes base
Step 2
Next, we have a tendency to really want to relinquish our eyelashes a touch of a 3D look. Set your foreground color to #e7410e and brush gently on every hair.
Eyelashes details
Step 3
Next, we want to feature some hair shadows at the outer corner of the attention.
Create a replacement layer and name it "Eyelashes shadows". Set it to Multiply mode, and lower its Fill to around seventieth. Then take constant brush from before, set it to #1f0b07 and brush some eyelashes round the lower outer corner. Then attend Filter > Blur > mathematician Blur and provides it a soft one.5 blur.
Eyelashes shadows
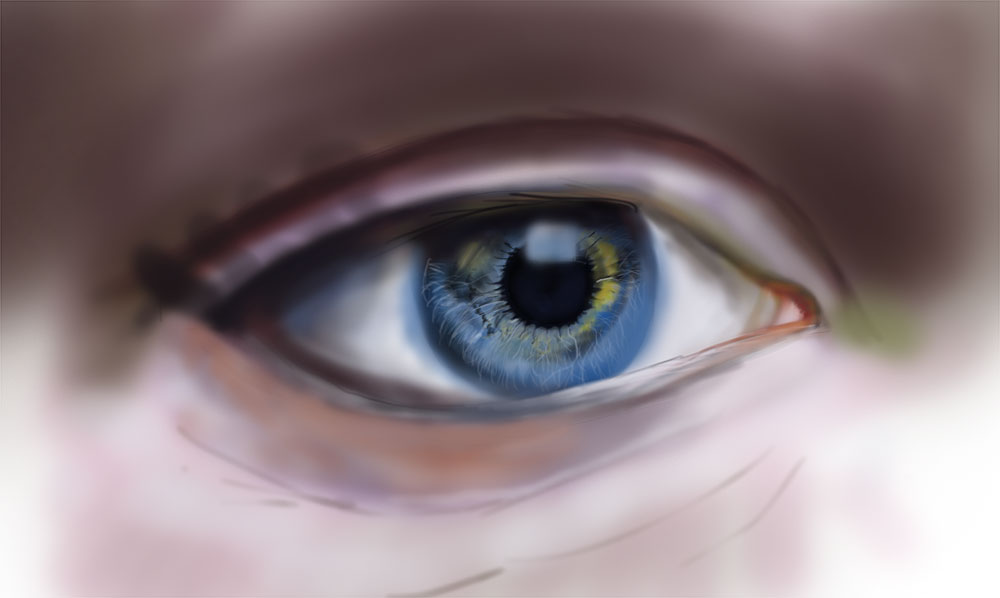
16. Eye Details: Depth Shadows
Now that we've got a a lot of solid plan concerning our eye, let's return to the eyeball and iris, also as processing any areas that appear to want it.
Let's begin that off by giving our eye a lot of "pop factor".
Create a replacement layer and move it on high of your "Skin" one. Then set it to Multiply mode.
Set your foreground color to #6f2719 and brush gently at the bottom-left corner to extend the number of shadow. See below for a comparison:
More shading
17. Eye Details: Iris
Compared to the remainder, the iris remains pretty flat. Let's work on that!
Step 1
Take alittle, hard, spherical Brush (B) with each Pressure and Opacity interference turned on. change the dimensions to alittle one and build some radial strokes on the brink of the pupil, like so:
Iris detail shadows
Step 2
To create a highlight, build a replacement layer and place it higher than the "Iris" one. Set it to paint Dodge mode and lower its Fill to around four-hundredth.
Next, set your foreground color to #f2c7b4 and brush a half-moon form to the lowest right of the iris:
Iris highlight
Step 3
Create a replacement layer higher than the your "Iris Detail" one, set it to paint Dodge mode and lower its Fill to around half-hour. Take a soft, spherical Brush (B) and set it to Dissolve mode. Brush gently round the iris space. Then you'll press Control-E (Command-E on a Mac) to merge it with the most iris layer:
Iris details
18. Painting Finer Details
Time for the finishing touches!
Step 1
First we'll add blood vessels.
Set your foreground color to #5e2219 and take a tough, spherical Brush (B) with each Pressure and Opacity interference on.
Adjust the comb size to two PX and gently brush small blood vessels round the corners of the attention, over the white of the attention.
Blood vessels
Step 2
Now for a few depth shadows.
Create a replacement layer and move it right below your "Skin" one.
Set it to Multiply mode and lower its Fill to around eightieth. Name it "Shadows".
Set your foreground color to #3e1408 and with a tough, spherical brush with solely Opacity interference on, brush round the edges of the attention white.
Then change the dimensions of your brush to a awfully tiny two PX one, and brush over the Highlight to form the illusion that the higher eyelashes square measure reflective into the pupil:
Painting shadows
Step 3
Moisture glimmers.
Create a replacement layer, name it "Moisture" and move it higher than your "Skin" layer.
Then set your foreground color to white #ffffff and brush some lightweight points on the lowest of the attention white:
Adding in wet glimmers
19. Adding the supercilium Base
Step 1
It conJoinly wants associate supercilium, does not it?
Create a replacement layer, name it "Eyebrow" and place it on high of all of your alternative layers.
Set your foreground color to #47190b and take a tough, spherical brush with Opacity interference turned on, and brush the rough form of the supercilium.
Eyebrow base color
Step 2
Take the Smudge Tool and set it to a tough, spherical brush with Size interference set to Pen Pressure. Smudge around to form a furry detail look:
Eyebrow smudge
20. Adding supercilium Detail
Step 1
Next, take the comb Tool (B) and set it to a tough, spherical brush with Size interference set to Pen Pressure. Brush away particularization hair strands:
Eyebrows detail base strands
Step 2
Set your foreground color to #9a3d1e, provide your brush Opacity interference set to Pen Pressure and build it a touch larger by some pixels, then brush some rough lighting details. you'll keep these strokes a touch random, soft and wide, to feature selection.
Eyebrows base highlight
Step 3
As a final quantity of detail, build your brush terribly tiny again—1 or two pixels—and brush many terribly skinny, flash highlight hair strands:
Eyebrows finishing detail strands
21. Eyebrows mixing With the bottom Skin
Our supercilium appearance nice, however a touch affixed on. To mix it a lot of with the skin around it, produce a replacement layer and place it beneath your "Eyebrow" one. Set it to Multiply or Linear Burn mode, counting on own style. Then lower its Fill to around four-hundredth and name it "Eyebrow Blending".
Make your brush larger, set your foreground color to a dark, desaturated brown like #502520, and brush round the edges of the supercilium. Then attend Filter > Blur > mathematician Blur and provides it a soft 3–4 PX blur impact to get one thing like this:
Eyebrows mixing
22. Optional: Adding Makeup
Even more, we will currently add makeup to our eye!
I for one selected soft fall colors: #e88f04 and #572013.
Step 1
For the orange, produce a replacement layer higher than your "Skin" one, set it to paint mixing mode, and brush around with a soft, spherical brush. Lower Fill to style.
Orange makeup
Step 2
Next, the shadow. New layer, set it to Multiply mode. Brush the attention "tail" and round the top-right higher protective fold. attend Filter > Blur > mathematician Blur if {you feel|you square measure feeling|you're feeling} your strokes are too sharp.
Brown makeup
Advertisement
Step 3
Create a replacement layer another time, set it to paint Dodge and lower Fill to around half-hour. Set your foreground color to #f7b283. 1st take a soft, spherical brush and set it to Dissolve mode, then brush around to form the glitter impact. Then grab the Makeup brush from the comb pack provided and paint some texture variations.
Texture
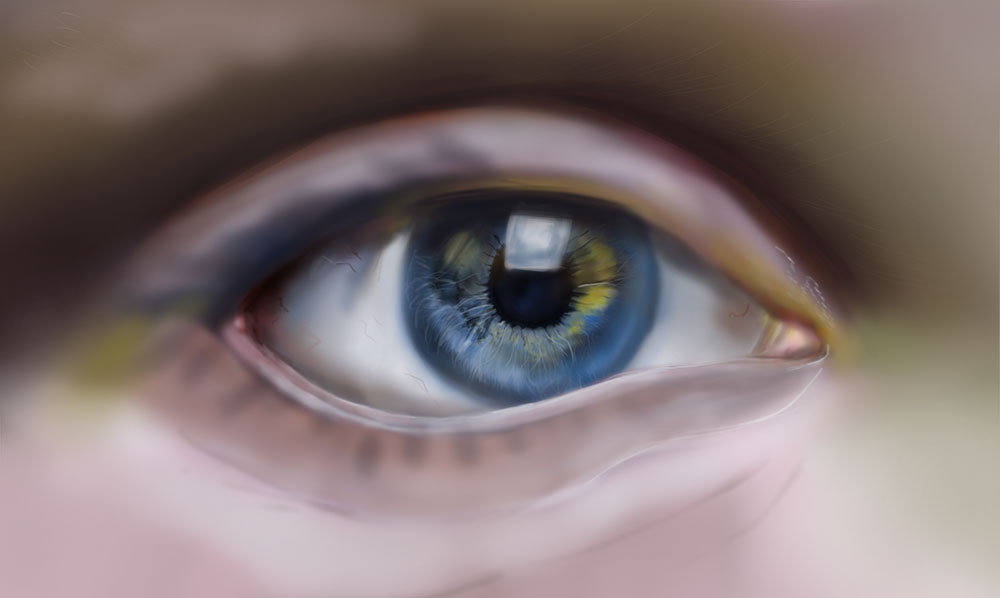
Awesome Work, you are Done!
That is it! you'll currently paint your own realistic eye. I hope you enjoyed the miscroscopic journey and learned one thing useful! be at liberty to let American state grasp if there's any bump on the road that you would like American state to clarify in additional detail, and happy artsing!